Skip to Main Content
Back to Navigation

How to Apply Deck Stain

A family enjoys their wooden deck and backyard gazebo on a sunny summer day. The deck includes two white rocking chairs with a brown brick house in the background.

Who doesn’t love spending time outside on a deck? It’s the perfect place to enjoy summer days and nights with family and friends. But a wood deck requires maintenance to keep its beauty. Staining a deck protects the wood and blocks out water and dirt, which can degrade and weather the deck over time.

If you’re wondering how to stain a deck, we’ve got you covered in this easy referral guide. Follow along to learn the best way to apply deck stain and maintain the look of your outdoor space. With preparation, you can easily stain your deck on your own. We’ve compiled a few tips to help.

Materials to Stain a Deck

What's the best way to stain a deck? Well, it depends on a few details (like your deck materials), but there are several similar steps for most decks. If you're ready to stain a deck, start by gathering all the supplies you'll need. The supplies to stain a deck include:

Choosing the Best Stain for Your Deck

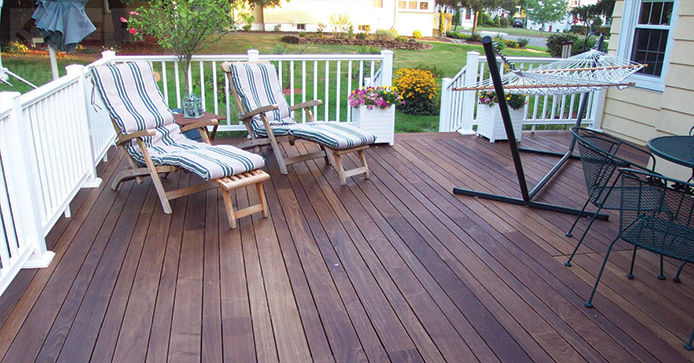
A dark-stained wooden deck is surrounded by a white guardrail. The deck features two striped lounge chairs, a hammock, and several potted plants.

Which deck stain should you choose? There’s a wide range of deck stain options ranging from transparent to opaque stains. Semi-transparent and semi-opaque stains fall in the middle. It’s really a matter of your personal preference (and what you already have in place).

  • Transparent Stain: Allows woodgrain to show but requires more maintenance and upkeep. Generally, transparent stain needs reapplication every year.
  • Solid Stain or Opaque Stain: Covers up the natural grain of the wood but typically last 3-5 years before they require a new coat of deck stain.

When choosing the best stain for your deck, the main question is how much upkeep you prefer to do and how much you'd like the woodgrain to show. If you're somewhere in the middle, you could also try a semi-transparent stain or semi-opaque stain. If you've had to replace boards and the wood on your deck doesn't quite match (or is older), choosing a new stain with higher coverage might be best.

Once you’ve decided on a type of stain, you’re ready to begin. You’ll want to be sure that you’ve got plenty of time. Depending on the size of your deck, applying stain might take several hours.

It's also important that you choose a day when the weather is between 50° - 90°. It's best to avoid applying deck stain in direct sunlight, or the finish will dry too quickly before the wood fully absorbs it. Check the forecast, too—you want to apply deck stain on a day when there's no rain for at least 12-24 hours. The best time to apply deck stain is on an overcast but dry day in the early summer.

An important note: if you're staining a brand-new deck made of treated lumber (as opposed to cedar or redwood), wait at least a few weeks before sealing the deck for the first time. The wood needs to dry or "cure" to absorb the stain properly. An older deck can be stained as soon as it dries from washing.

The Best Way to Stain a Deck

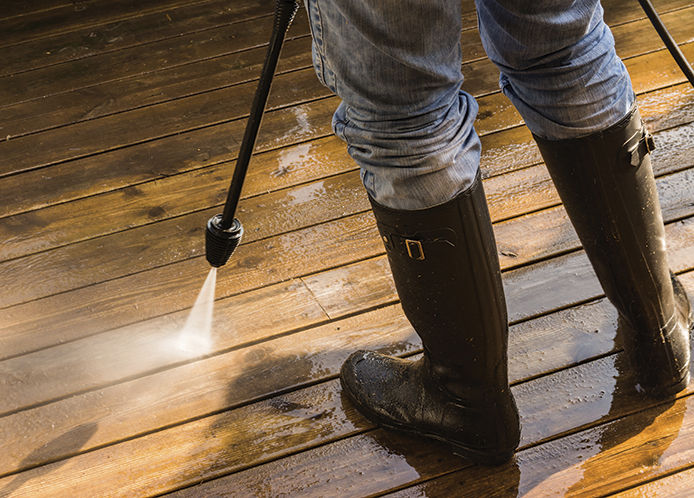
A person wearing jeans and black rubber rain boots uses a power washer to spray and clean the surface of a wooden deck.

Staining a deck starts with preparation. Before you begin, you will want to completely clear all furniture, plants, and pots from the deck surface. The deck floor should be completely clear, so you'll have ample room to work. Gather your supplies and make sure that you're ready to start staining the deck. You may want to use plastic sheeting or drop cloths to cover the concrete leading up to the deck or any other areas that you don't want to accidentally stain.

Step 1: Clean the Deck

Before you start to stain your deck, you need to clean the deck thoroughly. First, use a broom to brush off the deck. As you sweep, look for any popped nails or areas of concern that you might need to address before you start to stain. Most popped nails can be driven back in with a hammer. Sand any splinters too. As you clean the deck, it’s also a good time to repair or replace any damaged deck boards.

Once your deck is in good condition, you should apply deck cleaner and allow it to sit for 15 minutes on the surface of the deck. Read the instructions for your particular cleaner, but most brands require that the deck stays wet as the cleaner soaks into the surface. If there are areas where the old stain has chipped or peeled, it's a good idea to sand it off so you're working with a clean surface.

After the cleaner has set, rinse the wood with a garden hose or a power washer (on the lowest setting). If you’re using a power washer, choose a psi of 1200-1400 with a 45° tip on the pressure washer. If you need help deciding on the best pressure washer to stain your deck, don’t miss our Pressure Washer Buying Guide. No matter how you clean, be sure to spray along with the woodgrain to avoid damaging the surface of your deck while pressure washing.

Step 2: Test a Spot

You should only stain the deck when the wood surface is completely dry. Otherwise, the deck stain won't properly adhere or last. Once you've given the deck time to dry completely, you should test a small inconspicuous area to ensure you like the color of stain you've chosen. Let the small area dry before you apply your fresh coat of stain to the entire deck.

Step 3: Prepare the Stain

If you plan to cover a large area, mix all the stains together—this will ensure that the color is consistent across the entire deck. For new decks, you'll need one coat of an oil-based deck finish. Older decks may require multiple coats to get the best coverage and look.

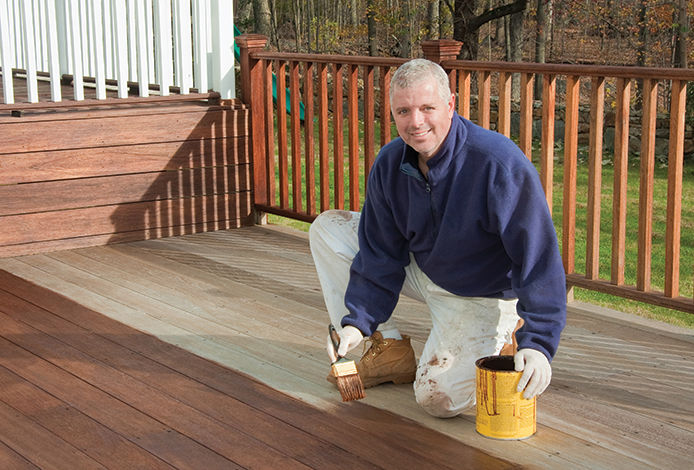
A grey-haired man in a navy-blue shirt and light-colored pants wears gloves and applies stain to a wooden deck. The stain is in a yellow-colored can, and the man uses a brush to apply the stain following the woodgrain of the deck.

Step 4: Apply the Deck Stain

Using a paint roller or a 4-inch brush, you’ll want to apply an even coat of stain to the deck. Work quickly, making sure that you follow the woodgrain as you go.

Keep in mind that natural bristle brushes are the best choice for wood staining. They will help you easily work the stain into the grain of the wood. Work by heavily coating the open end-grain of the deck boards with stain. Work by brushing 2-3 boards at a time, applying stain to the entire length of the board using long, smooth strokes.

To avoid lap marks, ensure the stain's leading edge is kept wet. Brush the wet stain into the already applied stain's wet edge. Use just enough stain for coverage—too much stain will look messy and cause problems. In this case, more stain is not better. Overapplying excess stain can cause it to peel or crack when exposed to moisture. It can also result in a sticky surface, preventing it from drying properly.

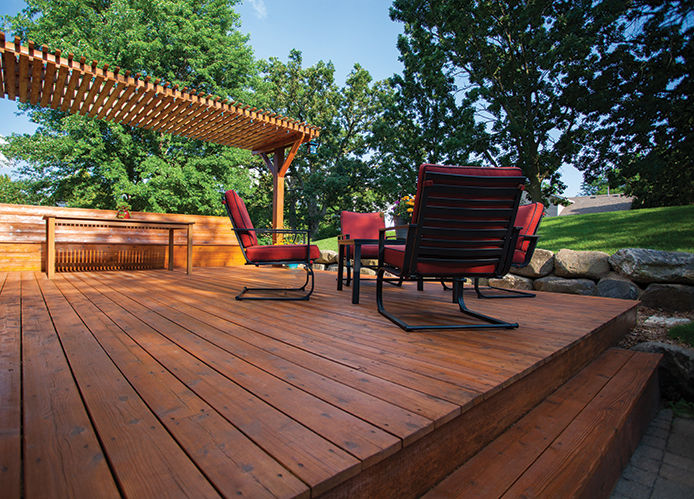
The image shows a stained wooden deck on a sunny day. The deck features four red patio chairs grouped around a table.

Step 5: Allow the Deck to Thoroughly Dry

Once you’ve applied the deck stain, you’ll want to let the deck thoroughly dry before using it or repositioning furniture and other items on the deck. It’s best if the deck stays dry for a few days as well, so take caution when watering your plants or using the garden hose around the deck. If you apply a second coat of stain, you'll want to be sure that the surface of the wood is completely dry from the first coat.

As the deck stain dries, check for any uneven spots or areas where you may need to apply more stain. For fixing streaks or spots, you can lightly sand the area and then reapply a coat of stain for an even finish.

How to Maintain Your Stained Deck

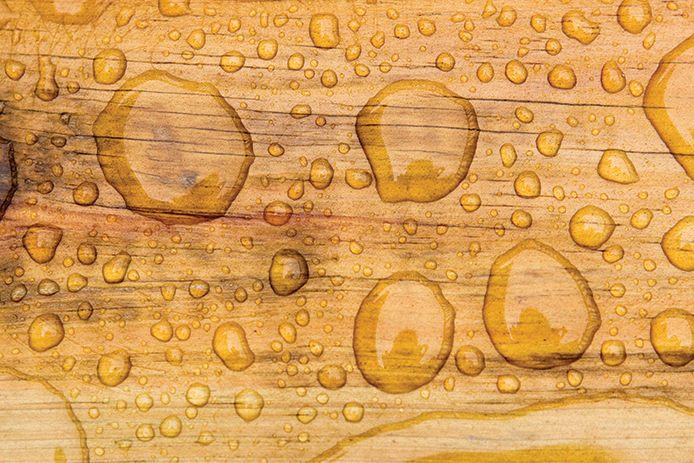
Water droplets are shown against a piece of stained wood.

Once your deck is stained and dry, the hard part is finished. Staining your deck protects the wood for one to several years. Because decks often see a lot of weather and foot traffic, you may need to reapply deck stain each season or every few years to keep it protected.

One way to keep your deck looking beautiful is to keep it clean. Sand, dust, dirt, and debris can degrade the deck stain over time. It can also help to add protective padding to deck furniture, particularly metal furniture, that can stain the deck. Decks don't require too much regular maintenance but keeping them free of dust and dirt will really help the coats of stain last a long time.

Wondering if it's time to restain your deck? Spray a bit of water on the deck and make sure that it stays on top of the wood (rather than soaking into the deck). If the drops of water bead up on the deck, it's probably okay—the deck stain is still repelling moisture. If it sinks in, it's time to restain.

Now, once stained, decks can withstand quite a bit of wear and tear, so you can feel free to enjoy your deck and have fun. After all, what's better than a sunny day sipping a cool drink and enjoying the sights of summer from your freshly stained deck?

Staining a deck is an easy DIY project, even for beginners. Be sure to follow the instructions in this guide, thoroughly clean the deck, sanding any rough spots before you stain. Apply the deck stain carefully and evenly, and then allow it to dry thoroughly.

For all the supplies you need to stain your deck, Do It Best have you covered! Explore our hardware stores for a wide range of supplies and tools for every homeowner project. We have everything you need for the best results.


While do-it-yourself projects can be fun and fulfilling, there is always a potential for personal injury or property damage. We strongly suggest that any project beyond your abilities be left to licensed professionals such as electricians, plumbers, and carpenters. Any action you take upon the information on this website is strictly at your own risk, and we assume no responsibility or liability for the contents of this article.


test

Elements of a Great Outdoor Kitchen

Seven items to add flair and excitement to your next backyard barbecue

Learn more
test

5 Reasons to Add a Backyard Griddle to Your Outdoor Kitchen

Find out why these flat-top wonders are the hottest trend in outdoor cooking!

Learn more
test

Grilling Accessories & How to Use Them

Check out these helpful tools to expand your grilling capabilities

Learn more
test

5 Tips to Caulk Like a Pro

Learn how to get the perfect bead of caulk for a professional-looking finish!

Learn more
test

Guide to Cooking with a Fire Pit: Tips and Considerations

Get ready to cook more than just marshmallows in your backyard this summer

Learn more